As a supplier of Led Shower Panels, I often get asked whether these modern bathroom fixtures are easy to replace. In this blog post, I'll delve into the various aspects of replacing LED shower panels to help you understand the process better.
Understanding the Basics of LED Shower Panels
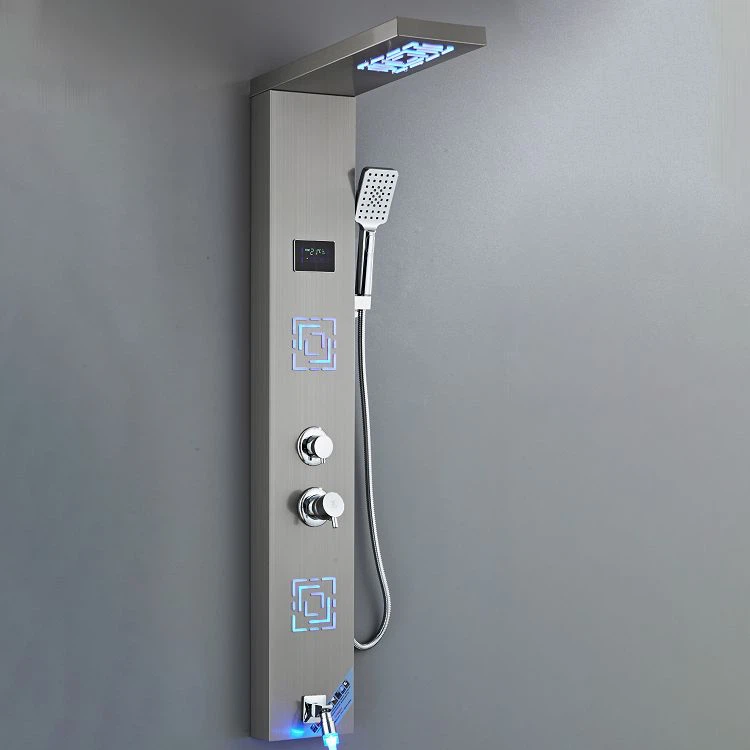
Before we discuss the replacement process, let's briefly understand what LED shower panels are. An Led Shower Panel is a high - tech addition to any bathroom. It combines the functionality of a traditional shower panel with the aesthetic appeal of LED lighting. These panels usually come with multiple showerheads, body jets, and the LED lights can be adjusted to different colors, creating a relaxing and spa - like experience.
Factors Affecting the Ease of Replacement
1. Compatibility
One of the primary factors that determine how easy it is to replace an LED shower panel is compatibility. If you're replacing an old LED shower panel with a new one from the same brand and model series, the replacement is likely to be relatively straightforward. This is because the new panel will be designed to fit the existing plumbing connections and mounting points.
However, if you're switching to a different brand or a significantly different model, you may encounter compatibility issues. For example, the new panel might have different pipe sizes or mounting hole patterns. In such cases, you may need to make some modifications to the plumbing or the wall mounting. This can add to the complexity and time required for the replacement.
2. Plumbing Knowledge
Replacing an LED shower panel involves working with water pipes. If you have basic plumbing knowledge, you'll find the replacement process much easier. You'll need to know how to shut off the water supply, disconnect the old panel from the pipes, and connect the new one securely.
For those without plumbing experience, it's advisable to hire a professional plumber. A plumber can ensure that the connections are leak - free and that the water pressure is properly adjusted. This can save you from potential water damage and costly repairs in the future.
3. Wall Structure
The type of wall where the shower panel is installed also plays a role in the replacement process. If the panel is installed on a drywall, it's generally easier to remove and replace. Drywall can be easily cut and patched if necessary.
On the other hand, if the panel is installed on a tiled wall or a concrete wall, the replacement can be more challenging. Removing the old panel without damaging the tiles or the wall surface requires careful work. You may need special tools like tile cutters or drill bits for concrete.
Step - by - Step Guide to Replacing an LED Shower Panel
Step 1: Shut Off the Water Supply
The first and most important step is to shut off the water supply to the shower. Locate the main water valve for your bathroom or the specific valve for the shower. Turn it clockwise until the water flow stops.
Step 2: Disconnect the Old Panel
Once the water is off, start disconnecting the old panel from the pipes. Use a wrench to loosen the nuts connecting the panel to the water pipes. Be careful not to damage the pipes during this process. Also, disconnect any electrical connections if your old panel has LED lights or other electrical components.
Step 3: Remove the Old Panel
After disconnecting the pipes and electrical connections, remove the old panel from the wall. This may involve unscrewing any mounting brackets or removing clips. If the panel is stuck, you may need to use a putty knife or a similar tool to gently pry it loose.
Step 4: Prepare the Wall
Inspect the wall where the old panel was installed. If there are any holes or damage, repair them. If you're installing a new panel with different mounting points, mark the new positions on the wall.
Step 5: Install the New Panel
Carefully place the new Led Shower Panel on the wall and align it with the marked mounting points. Secure it using the provided mounting brackets or screws. Make sure the panel is level and straight.
Step 6: Connect the Pipes and Electrical Components
Connect the water pipes to the new panel. Use new washers to ensure a tight seal. If your new panel has LED lights, connect the electrical wires according to the manufacturer's instructions.
Step 7: Turn On the Water Supply
Once all the connections are made, slowly turn on the water supply. Check for any leaks around the pipe connections. If you find any leaks, tighten the nuts or replace the washers as needed.
Our Product Range: SUS304 Shower Panels
In addition to our Led Shower Panel, we also offer SUS304 Shower Panels. These panels are made of high - quality SUS304 stainless steel, which is known for its durability and corrosion resistance. They are designed to be easy to install and maintain.
Our SUS304 Shower Panels come in various styles and configurations to suit different bathroom designs. Whether you're looking for a simple and functional panel or a more elaborate one with multiple features, we have options for you.
Conclusion
In general, replacing an LED shower panel can be easy or challenging depending on several factors such as compatibility, plumbing knowledge, and wall structure. With proper planning and, if necessary, the help of a professional, the replacement can be completed successfully.
If you're considering replacing your shower panel or are in the market for a new one, we invite you to explore our range of Led Shower Panels and SUS304 Shower Panels. Our products are designed with quality and ease of installation in mind. We're always ready to assist you with any questions you may have about our products or the replacement process. Contact us for more information and to start a procurement discussion.

References
- "Home Plumbing Handbook" by John Doe
- Manufacturer's installation guides for LED shower panels and SUS304 shower panels.